How to stream from OBS to Icecast
The streaming landscape has evolved dramatically with faster internet speeds driving demand for video content. While OBS has become the go-to tool for live video streaming, many broadcasters are discovering they need more flexibility in how they deliver content to their audience.
Here's the challenge: not every listener wants to commit to watching a full video stream. A two-hour DJ mix might be perfect as background audio while working, but less appealing as a video experience. Smart radio stations are responding by offering both formats – giving their audience the choice between audio-only convenience and full video engagement.
Traditionally, this meant juggling multiple tools: OBS for video streams to platforms like Twitch or YouTube, and dedicated audio clients like BUTT or Audio Hijack for Icecast servers powering audio-only streams. This workflow works, but it's not exactly streamlined.
What if you could simplify this setup? What if OBS could handle both your video stream to platforms like Twitch and simultaneously feed audio to your Icecast server – all from a single application?
The good news is you absolutely can. This guide will show you exactly how to configure OBS to stream to both video and audio destinations simultaneously, eliminating the need for multiple streaming tools while giving your audience maximum listening flexibility.
Configuring OBS
Now what we are about to do isn’t technically considered "streaming" by OBS. What we are actually going to rely on is OBS' recording functionality. OBS recording allows us to use FFmpeg which supports saving to a file or to a URL and since FFmpeg supports Icecast we can point it directly at an Icecast URL.
Sounds like magic? It kind’ve seems like it is. We weren’t initially expecting this to work. Talk about not using a tool for its intended purpose.
Now what you want to do is:
- Open OBS
- Go to settings
- Click on "Output"
- Toggle "Output Mode" to
Advanced - Go to the "Recording" tab
- Open the "Type" dropdown and choose
Custom Output (FFmpeg) - Open the "FFmpeg output Type" dropdown and choose
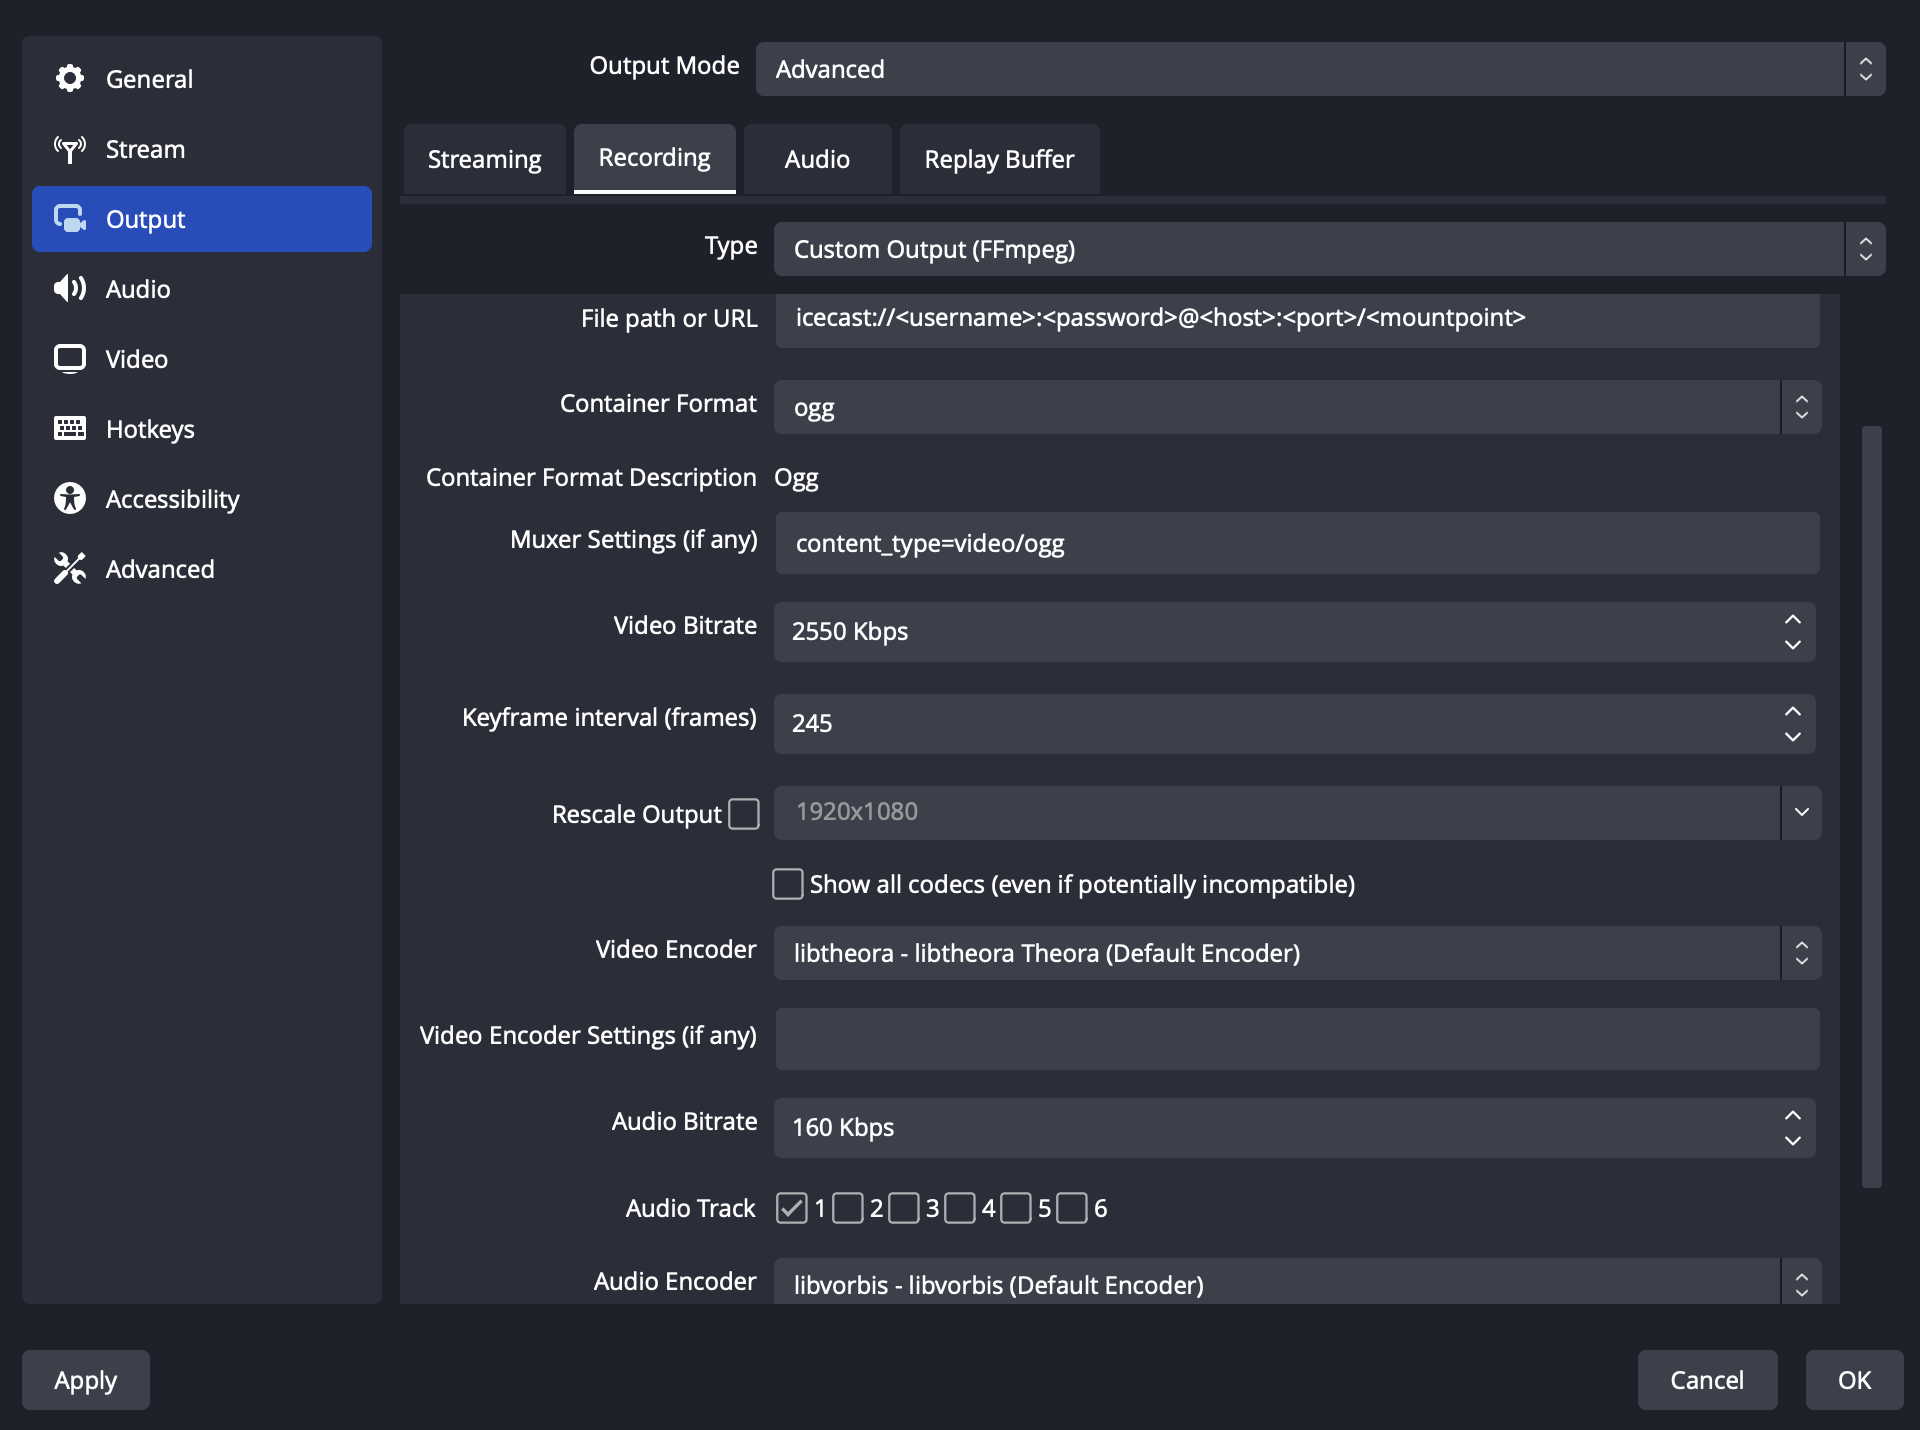
Output to URL - For file path you are going to want to set it to a URL in this format:
icecast://<username>:<password>@<host>:<port>/<mountpoint>- If you’re using Radio Cult then open your dashboard and copy your live stream connection values
- You’ll end up with something like
icecast://jill@radio-one.com:b4Y7Amr7d0@radio-one.radiocult.fm:9000/live
- Open the "Container Format" dropdown and choose
ogg - Set "Muxer Settings" to
content_type=video/ogg - Open the "Video Encoder" dropdown and choose
libtheora(or any other ogg compatible encoder available to you) - Set "Audio Bitrate" to the bitrate your Icecast is configured to
- Click "Apply"
- Click "OK"
Example OBS config

That’s it! You’re all set up. All that’s left to do is click "Start Recording" and your audio stream will be pushed through from OBS to Icecast.
With one tool, you’re now streaming both video and audio.

